

Contouring 101- Step by Step to Slim your Face!

Alright girls,
How many of us have secretly wished to change something about the dimension our faces? I know I sure have. Contouring, like highlighting, is a quick, worry free, and best of all, surgery free way to get it done. Below you will find information how to contour your face the right way (without looking or feeling cake-y or orange). The most important thing to remember here is to keep it light. You don't want to end up looking like you grew facial hair or even worse, had a really bad spray tan.
Just as with highlighting, technique is key. A little product goes a long way and you want to make sure that your only darkening the area's that are naturally a little darker. The point of doing this is to "fake" the appearance of shadows, creating more depth in places where the sun does not normally hit. This will build a much more sculpted look to your bone structure and in turn, completely slim and transform the dimensions of your face.
I have included a face chart for reference. Please understand graph is not in anyway a representation of how the makeup should look or be applied. Everone's face is different. This chart is not to scale, angels etc. will vary depending upon face shape. This is simply used to show the area's of the face discussed here-in. If you still have any questions/suggestions please feel free to post below. I do not own the rights to the chart. You can find a copy here.
Typical Area's to Contour
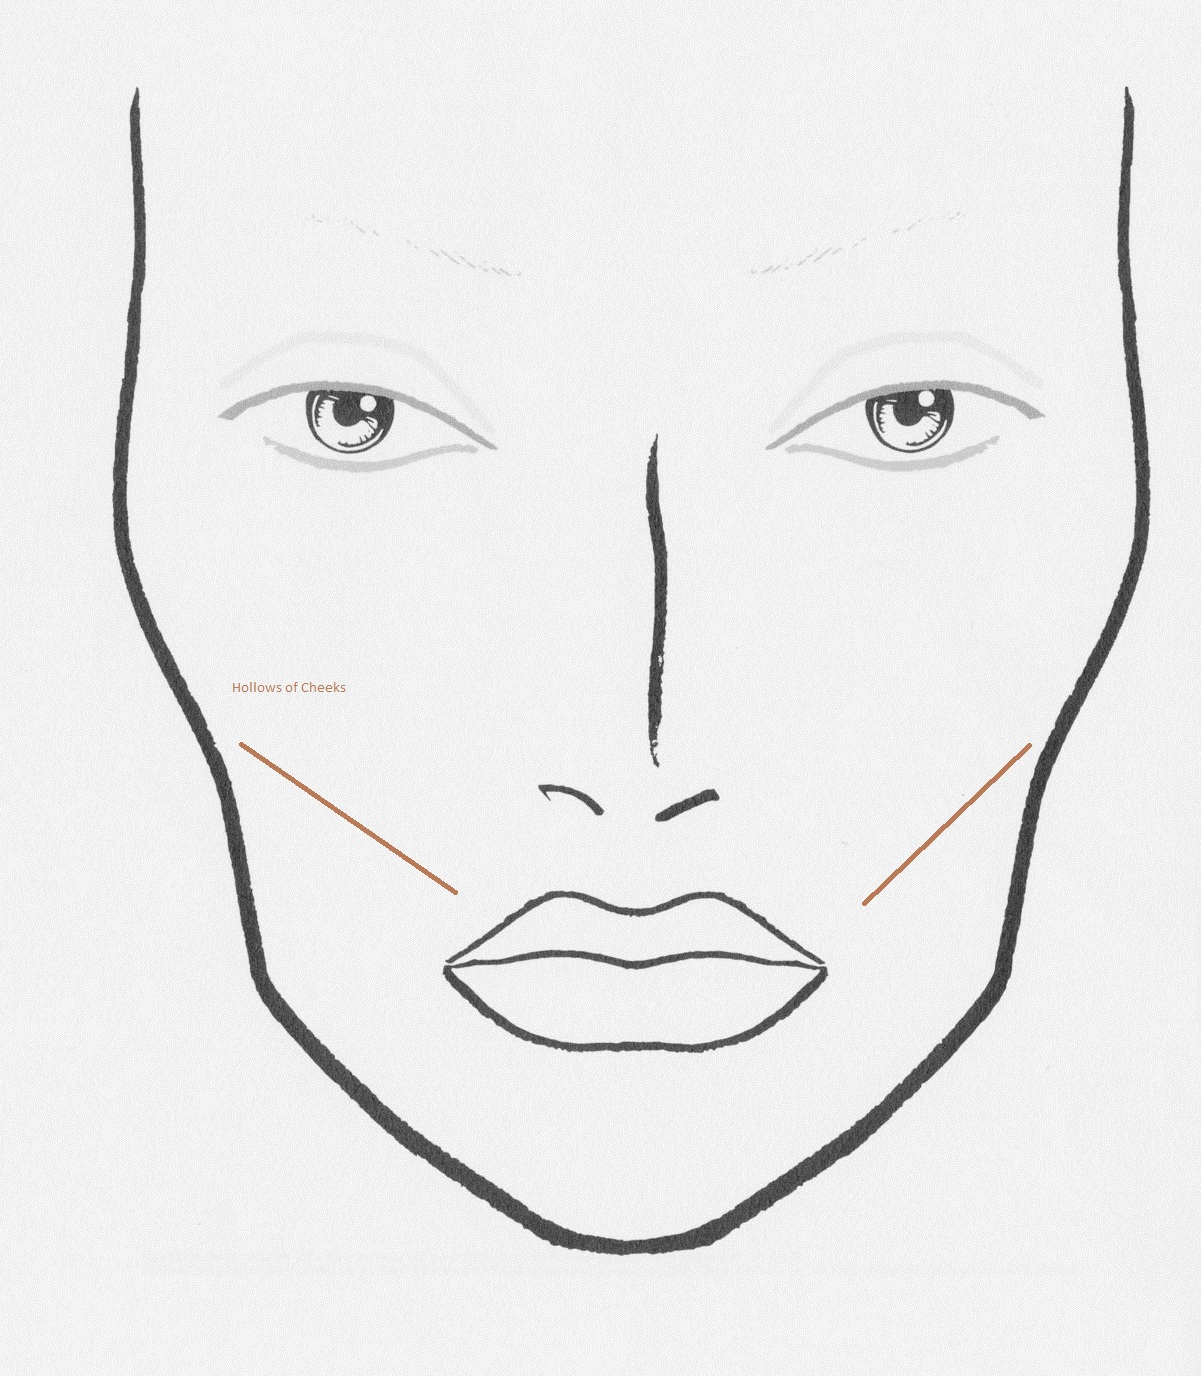
Where is this?This would be the area between your jawline and cheekbone. (Suck in your cheeks like a fish, to find this area)
My thoughts: Personally, I find this to be the most crucial place to contour and unless you already have very pronounced features (i.e. sharp jawline, high cheekbones) this should be the area to focus.
 Temples and Forehead:
 Where is this? The area on the side of your forehead (usually in alignment between your eye and the tip of your ear) and up to the top of the hairline at the very edges of the forehead (The two ends on either side that stick out a little further)
My thoughts: I believe that if you choose to contour your cheeks you definitely want to contour here too. It would look a little ridiculous to have that gap in your face and would essentially defeat the purpose all together. Please keep in mind, you don't want to apply any product to the middle of the forehead! Stick to the edges only!
 Nose:
Nose:Where is this? Here you would want to focus application on either side of the bridge or in other words the edges. You can use the indent on your nostrils as a point of reference. You would bring each of the lines from the very top of the nose and connect them under the tip of the ball (in the middle of your nostrils)
My thoughts: This part of the process is by all means optional and is used only to create a slimming effect of the nose in whole. If you already have a pretty petite nose or prefer it's natural size, than I'd say skip this step all together. However, if you do prefer for your nose to appear slightly smaller this would be a perfect way to achieve it.
 Jawline:
 Where is this? The space underneath of your jaw and chin.
My thoughts: Again, this is another optional area to contour. If you already have a very pronounced jawline I would recommend straying away from adding any additional shadow here. It will only add more depth and make the jaw appear more angular. For those of you wanting to add some dimension to an understated jawline, this is the perfect way to do it. Shading here adds depth and definition under the chin. It will instantly add a jawline where one may have originally lacked.

Application:
Cheeks and Temples:Take a matte facial powder or non shimmery bronzer of your choice that is approximately 3 shades darker than your natural skin tone. (I know, sounds scary but just trust) suck in your cheeks to find the area, apply a very small amount of powder to some sort of blush brush (preferably angled). Remember, you can always add more later if need be, it's much harder to remove than to add!!! Draw a thin line from the bottom of the hollow to the top and stop where your cheekbone begins. You want to make sure you are drawing in a diagonal motion keeping in conjunction with the shape of your face. Once you have your line applied, begin to buff it in. Blend upward towards your temples and onto the sides of the forehead. Keep the powder as close to your hairline as possible. You only want to build an outline. Continue blending (Blend, Blend, Blend!!!) in this same pattern until the powder is almost unnoticeable. You should now have see a slight change in the Height and width of your cheeks and forehead.
Nose: Draw a thin line down each side of the nose (along the bridge, using the place where your nostrils indent as a reference point). Using a small taper brush of some sort works best here. Bring the line underneath the tip of the nostrils and connect in the very middle. Now, you just need to buff the lines in until they are barely visible. The key is to create an illusion of structure without it being noticeable to anyone else.
Jawline: Use a fluffy blush brush or kabuki brush to buff powder under the chin and on both sides under the jawline but keep the concentration of color at the very edges here. Blend back and inward toward your throat. Remember to use minimal amount of product necessary otherwise, it will come off as if you've grown a beard overnight. Not at all flattering for anyone!
I really hope you all enjoy trying out these tricks and I would love to hear how it works out for you. I am also open to any kind of feedback regarding this and I will try to answer all questions in a timely fashion.

